Affichage des articles dont le libellé est Pantalon. Afficher tous les articles

16 mai 2016

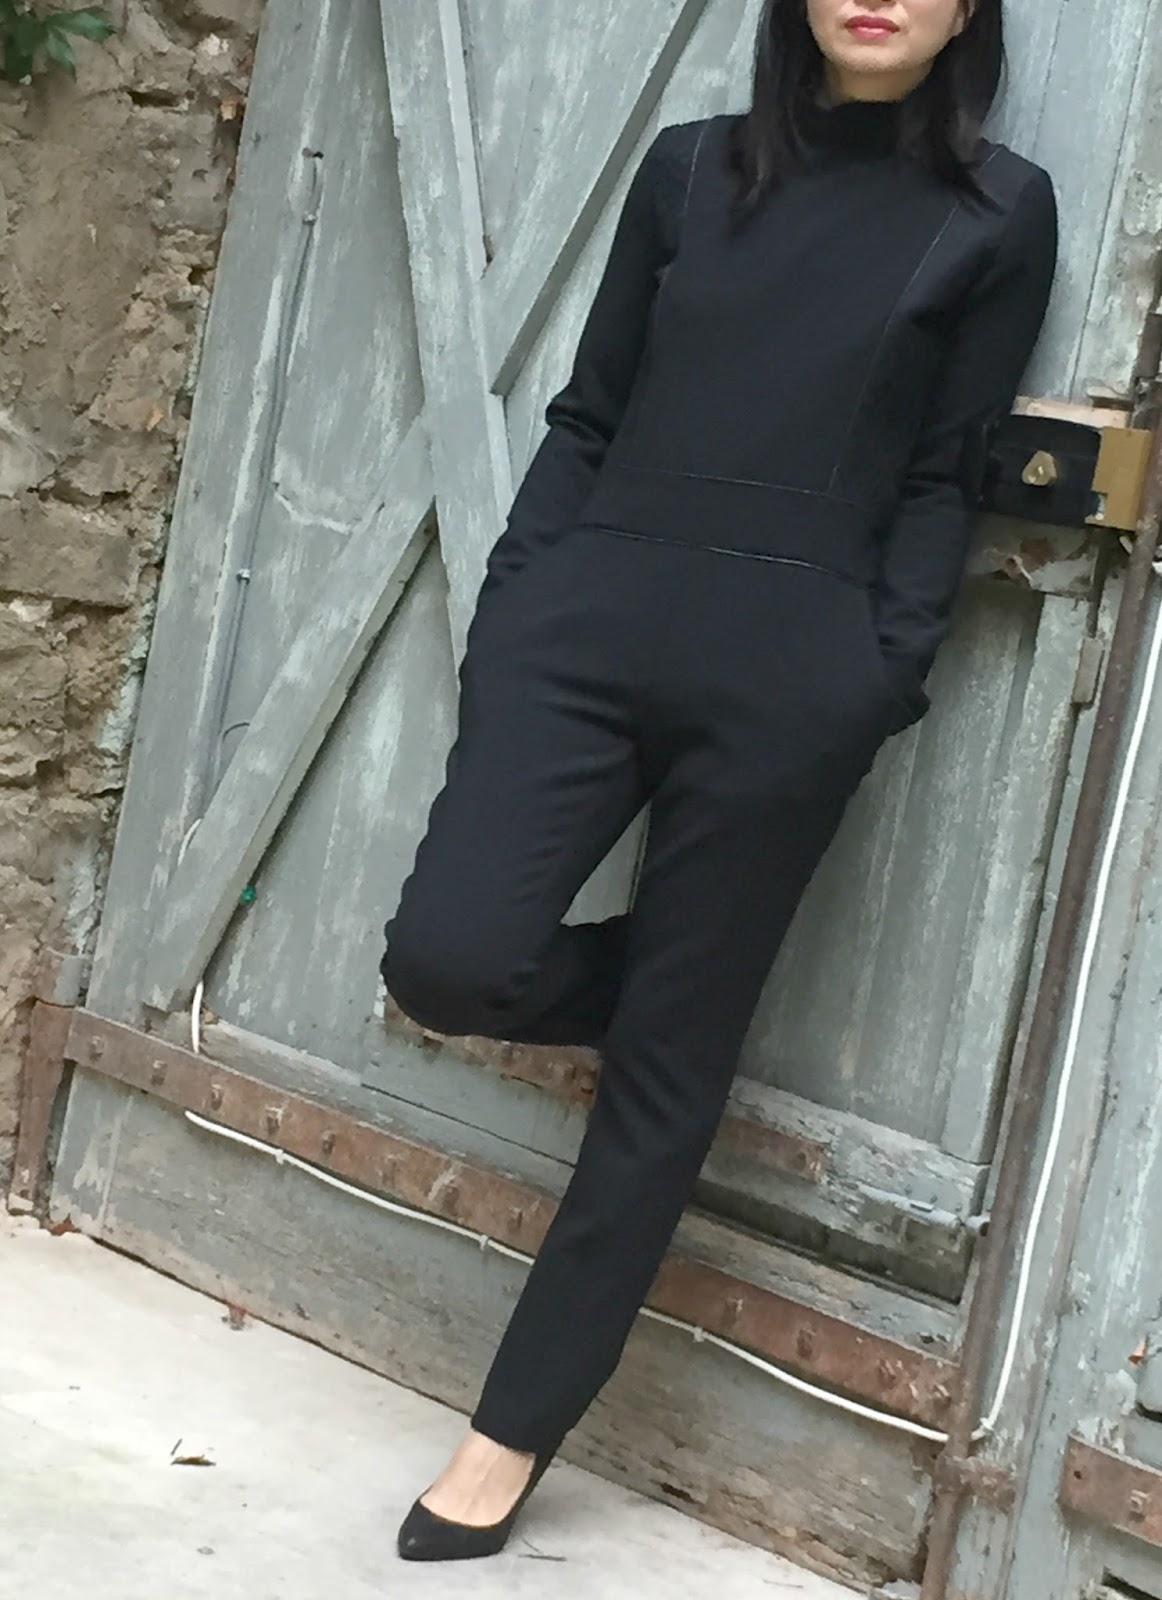
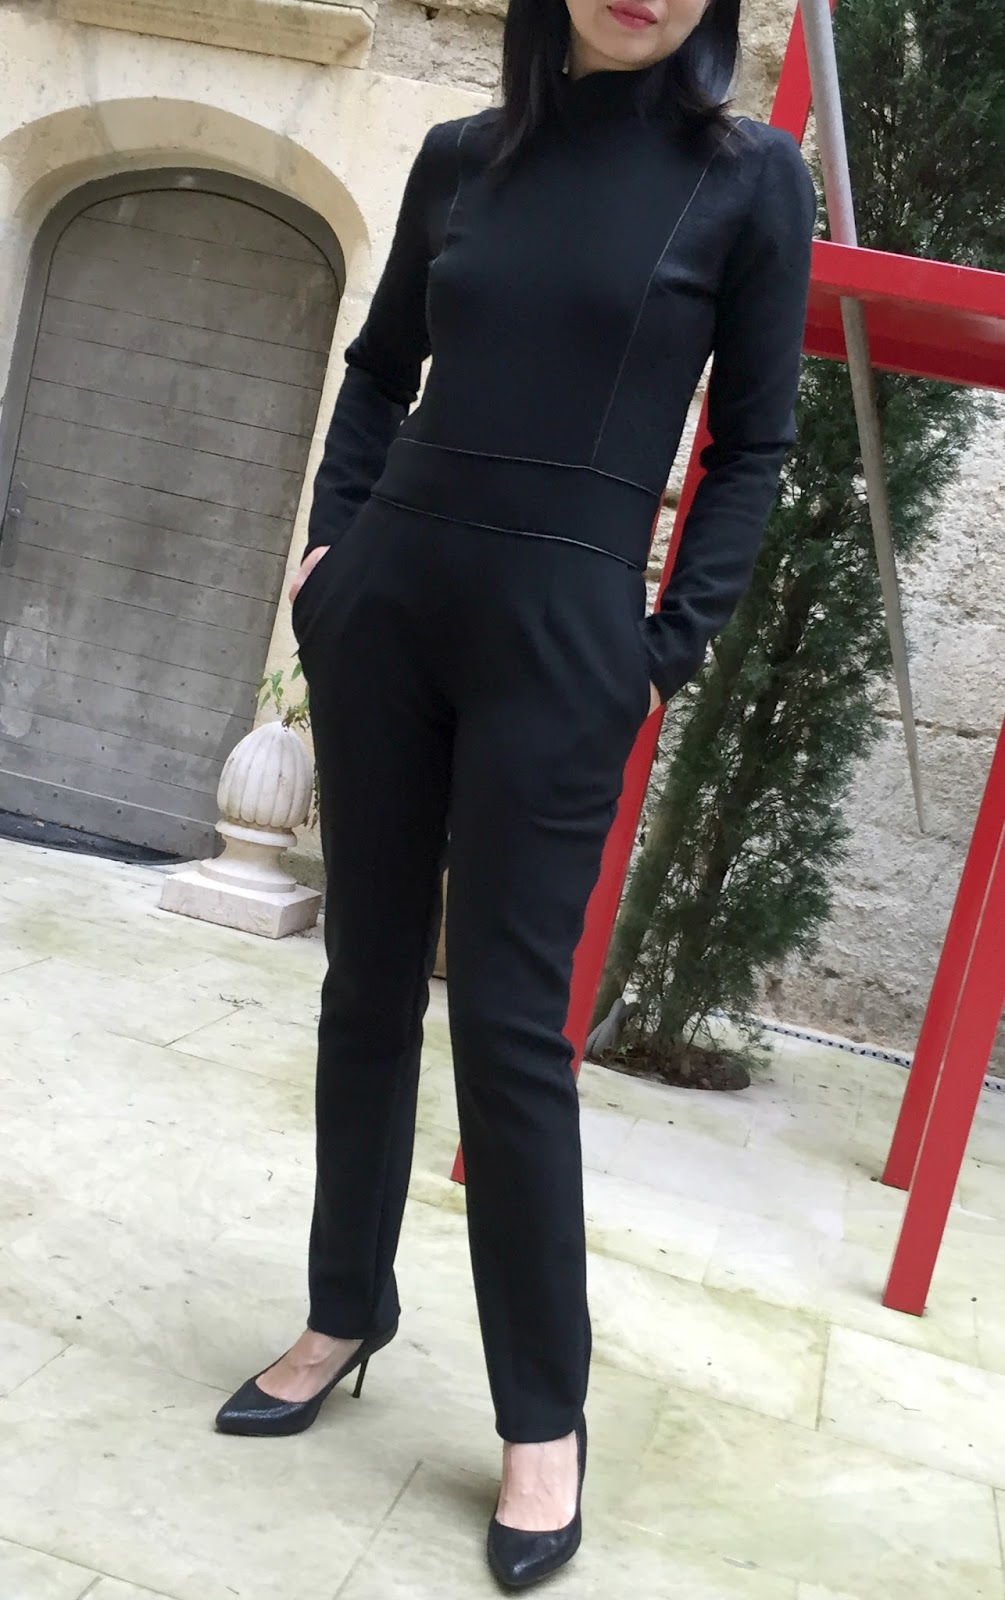
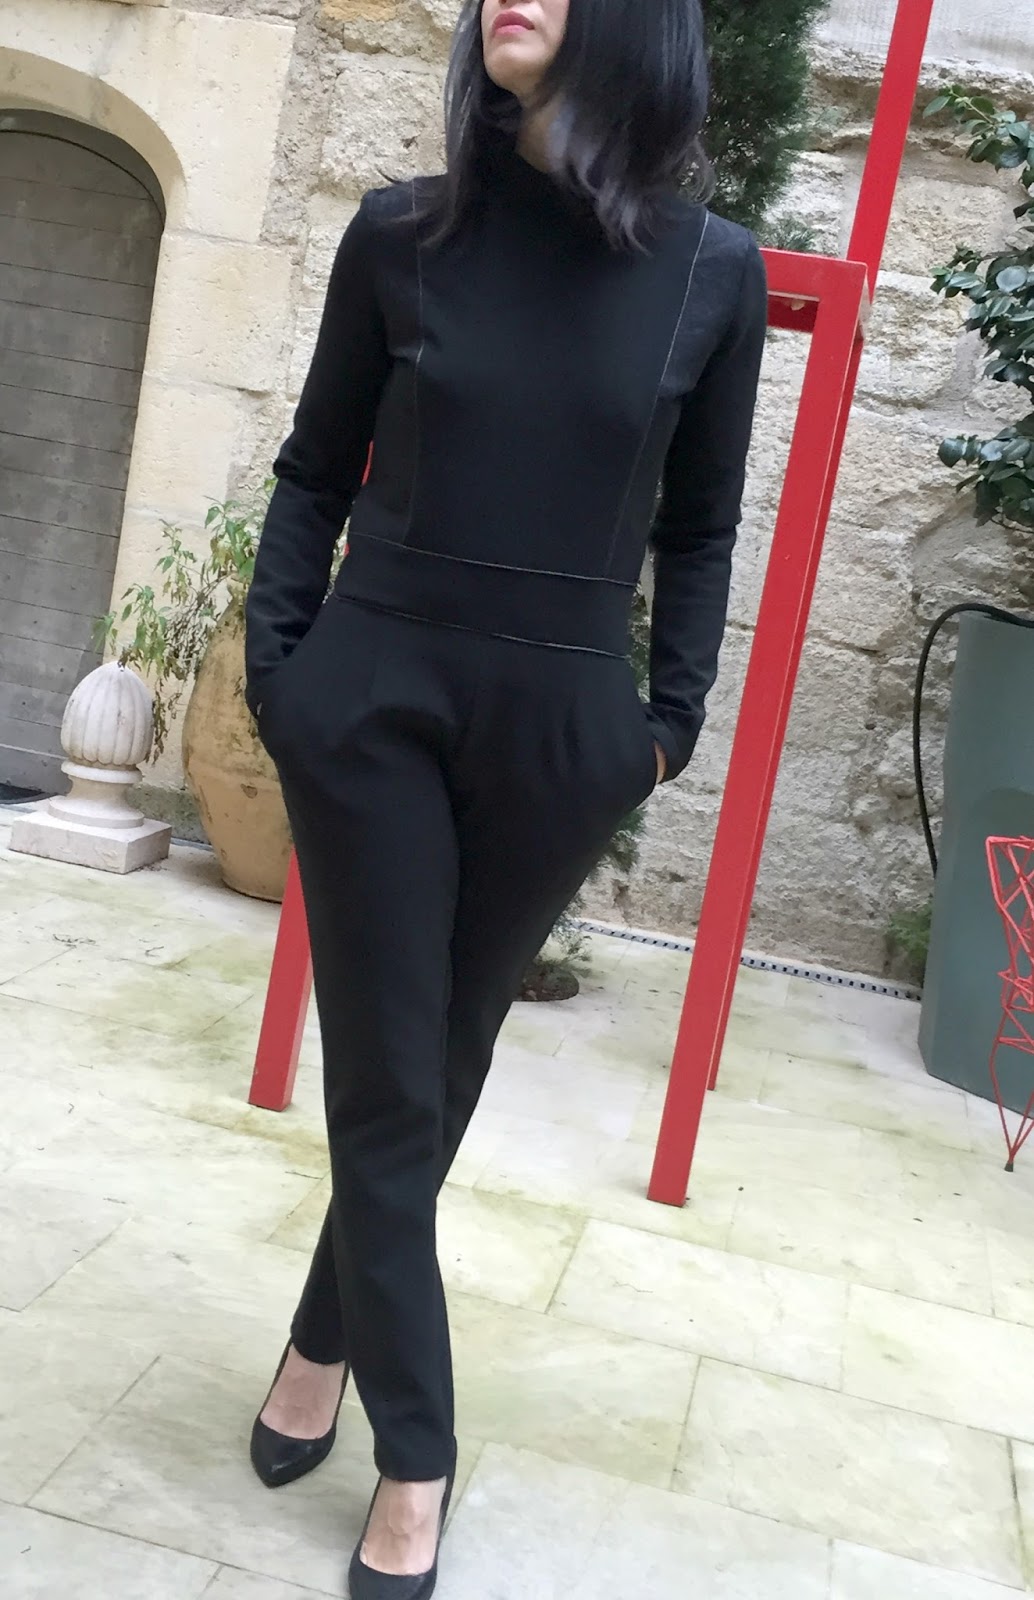
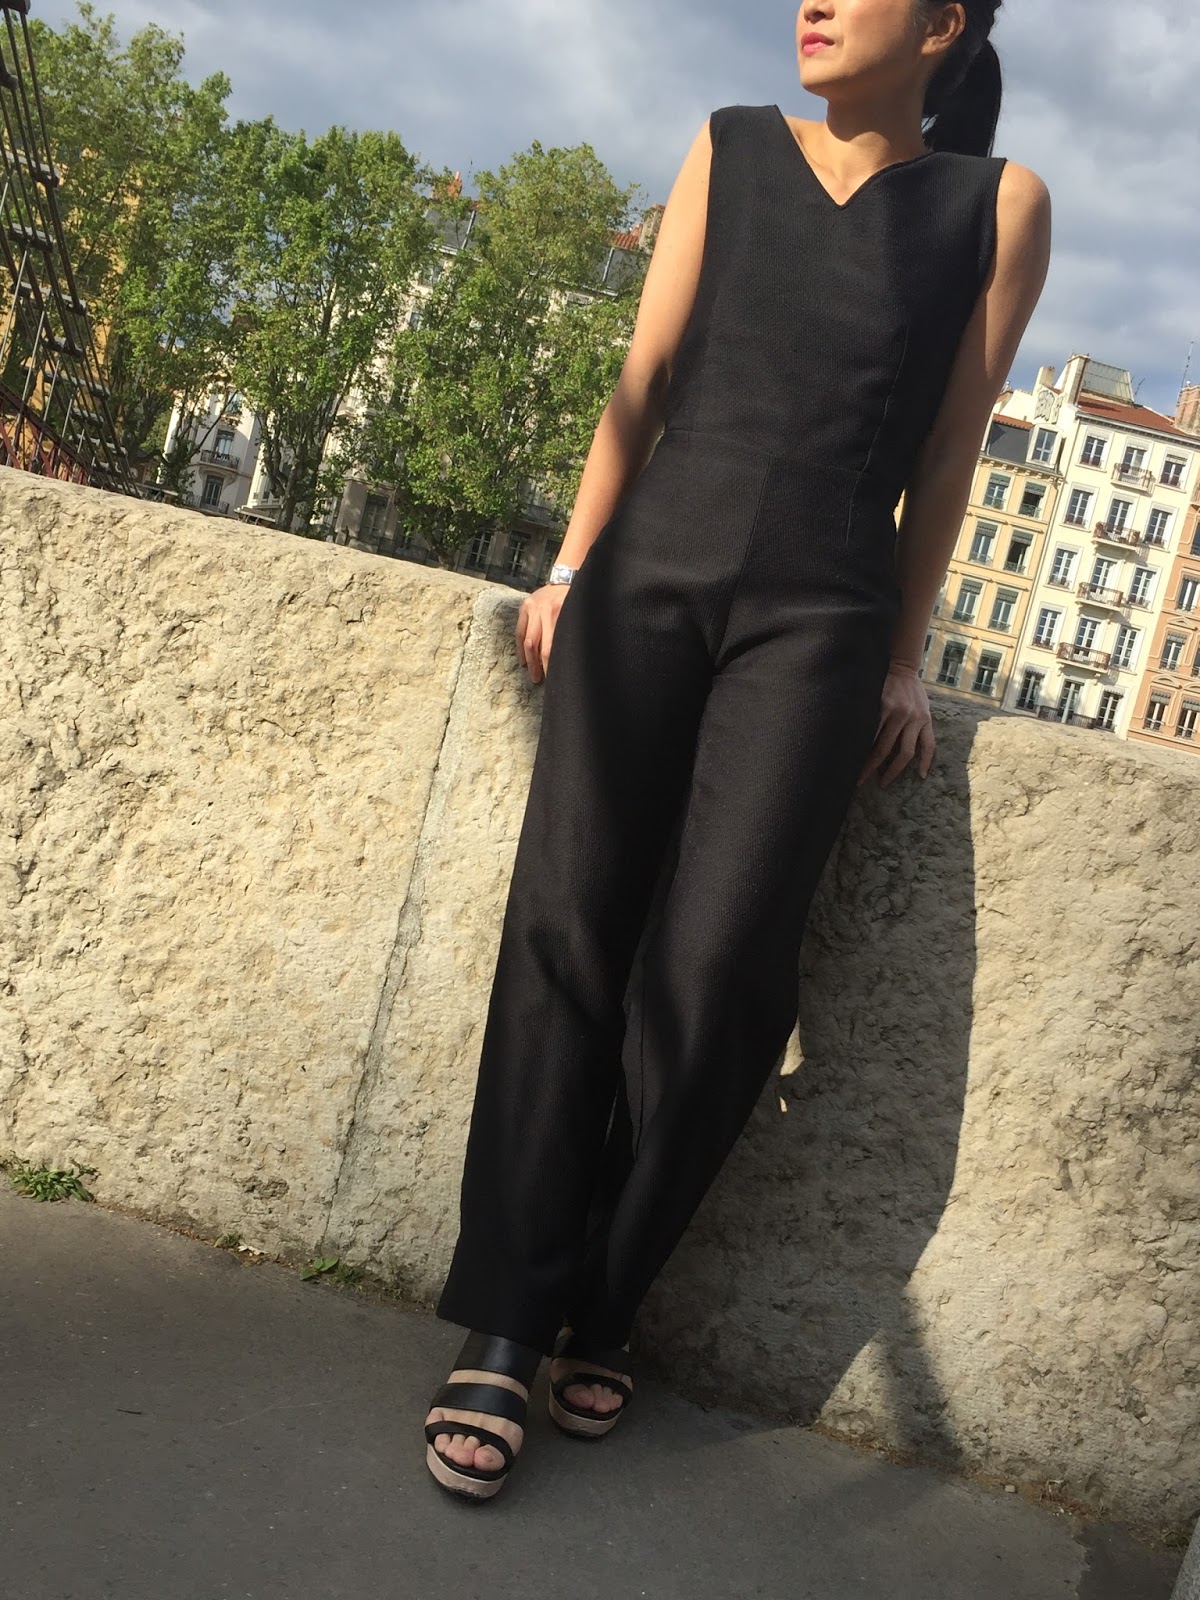
Combinaison pantalon Amélie

Comme vous le savez, j'affectionne les patrons Couture de Coralie Bijasson pour ses coupes intemporelles et toujours impeccables.
Ainsi Coralie a choisi de nous régaler avec le dos V avec des bretelles croisées décliné en robe Amandine ou combinaison pantalon Amélie by Coralie Bijasson. Après le pantalon taille haute Embrun by Dessine moi un patron, je me suis dit que la coupe pantalon droit délivrait une vraie ligne même si on ne mesure pas 1,80m ;)))
Ainsi cela m'a incité à me lancer sur la combinaison pantalon Amélie by Coralie Bijasson pour son style et surtout j'ai été interpellée par le faible nombre de pièces ;))
Pour cette première, j'ai choisi un jersey piqué déniché lors de la dernière virée chez Bennytex. Il est idéal par sa consistance et son rendu est très chic.

Combinaison pantalon Amélie - Sandales compensées Another Stories
Niveau : Intermédiaire - Temps de réalisation : 4H - Coût : €€€


En préambule, il vous faudra 2,70m de tissu pour un T36. Peu de pièces à couper et surtout les finitions sont top car le devant et dos sont doublés.
Ainsi vous commencerez par réaliser les pinces devant sur les deux mêmes morceaux idem pour le dos. 
Puis vous viendrez superposer et coudre endroit contre endroit des devants aussi vous viendrez retourner incluant les bretelles. Je vous invite à bien repasser puis vous pouvez surpiquer le col et les bretelles. Puis vous viendrez coudre le dos hors le côté gauche pour le zip.


Une fois le haut réalisé, on attaque le pantalon avec la couture des pinces. Puis vous allez coudre le haut et le pantalon en prenant soin de bien faire coïncider les pinces haut et bas dans un souci de continuité. Il ne vous restera plus qu'à coudre le zip invisible aussi il est important de surpiquer une fois le zip rabattu. 


Dernière étape : Pour un ajustement optimal, je vous invite à tester au préalable la juste longueur des bretelles. Aussi j'ai préféré coudre les bretelles ainsi que les boutons dénichés chez la Droguerie (diamètre 2cm) à equi distances je me suis repérée avec les pinces du dos.


En conclusion, je suis ravie de la coupe et l'effet promulgué par cette combinaison car elle est accessible et astucieuse avec ses bretelles. Elle  peut se décliner avec des tissus plus légers tel que la crêpe ou viscose. La combinaison pantalon Amélie by Coralie Bijasson se porte volontiers avec des sandales compensées ou escarpins  ;))) 

Patron : Combinaison Amélie by Coralie Bijasson (15€ en pochette papier)

Tissu : T 36 - Jersey piqué by Bennytex (2,70m x Laize 1,50m, 200gr ) - 8€/m - 2 boutons

-----------------------------------------------------------------------------------------------------------------

As you know, I like Coralie Bijasson patterns for its timeless and always impeccable cuts.
Coralie chose to please us with V back with crossed straps available in Amandine dress and Amélie jumpsuit by Coralie BijassonAfter high waist Embrun pants by Dessine moi un patron, I told myself this cut of pants delivered a nice line even if you do not measure 1.80m;)))

So it made me throw myself on the Amélie jumpsuit by Coralie Bijasson for its style and above all I was challenged by the small number of parts;))
For this first, I chose a jersey stitched during my last trip in Bennytex. It is ideal for its consistency and delivering is very chic.


Level : Intermediate - Timing : 4 hours - Cost : €€€

At the beginning you need 105 inches of fabric for UK8. Few parts to cut and above all the finishes are top because the front and back are lined.
So you begin to realize the darts on the same two pieces same for the back.
Thus you come and sew overlay fronts place against the place you will come back also including straps. I invite you to board well then you can topstitch collar and suspenders. Then you come back out sew the left side zip.


Once made up, we attack the pants with seam clamps. Then you sew the top and pants, taking care to align the top and bottom clamps for the sake of continuity. It will do you just sew the invisible zipper as it is important to topstitching when folded zip.


Last step: For an optimal fit, I invite you to test in advance the length just braces. So I preferred to sew the straps and the buttons unearthed at the Drugstore (2cm diameter) at equi distance I spotted me with the pliers back.


In conclusion, I am glad of the cup and the style delivered by this Amélie jumpsuit by Coralie Bijasson because it is accessible and clever with its braces. It can be broken with lighter fabrics such as crepe or viscose. Amélie jumpsuit by Coralie Bijasson is doing willingly with sandals or heels;)))

PatternAmélie jumpsuit by Coralie Bijasson (15 € in paper pocket)

Fabric: UK8 - Jersey  by Bennytex(105in x 60in Width, 200gr) - 8 € / m - 2 buttons 

7 mai 2016

Combo Pantalon Embrun & Blouse Adeli

Comme vous le savez, j'aime beaucoup le style des patrons d’Émilie alias Dessine moi un patronAprès Violette, Dahlia et bien sûr Sirocco, Émilie m'a proposé de tester Embrun, pantalon taille haute avec une large ceinture ceintrée à la taille, agrémenté de 6 boutons et surpiqûre visible ou non.
Au vue de mon 1,61 m, je dois avouer que cette coupe de pantalon me laissait perplexe mais j'ai quand même décidé de me lancer et on verra bien ;)) Ainsi j'ai privilégié la sobriété donc j'ai ressorti un dénim jacquard légèrement stretch by Les coupons Saint Pierre
Et je dois dire qu' Embrun m'a convaincu que cette coupe de pantalon taille haute peut convenir aussi à une taille moyenne. A noter que les escarpins seront tout de même de rigueur pour éviter l'effet "tassé" ;)))

Parallèlement à la réalisation d'Embrun, j'ai réalisé une nouvelle version de la blouse Aréli by République du chiffon en effet j'adore cette blouse pour son plastron. Ainsi lors de mon dernier passage chez Bennytex, j'ai eu un gros gros coup de cœur pour cette sublimissime viscose plumetis et son imprimé "origami oiseaux". Légèrement transparente, je me suis dit que le plastron de la blouse Areli serait idéale ;) 

Ainsi l'association d' Embrun et d'Aréli m'a semblé comme une évidence pour un style so so chic :)))


Niveau : confirmé - Temps de réalisation : 5H pour Embrun et 2H pour Aréli - Coût : €€€


En préambule, je vous invite à revoir mes toutes premières versions de la
blouse Areli pour connaître les détails de conception. Malgré la fluidité de la viscose, la réalisation reste toujours aussi accessible et n'hésitez pas à agrémenter le détail du plastron avec un passepoil, j'ai choisi un passepoil "argenté" ;))


Passons à la conception du pantalon Embrun, il conviendra à des couturières déjà averties en effet il vous demandera une précision quant à la réalisation des empiècements devant et la réalisation de la poche passepoilée au dos.
Avant toute chose, n'oubliez pas de thermocoller les enformes, passepoil et poche ;))
Vous débuterez par le montage du devant à travers l'empiècement devant qui viendra cintrer votre taille et les 2 pans devant.
Je dois dire que leurs découpes sont ingénieuses en effet la patte intérieure des 2 pans devant vous permettront de coudre vos 6 boutons. 
Cette étape n'est pas compliquée mais elle vous demandera minutie : vérifier que les empiècements devant  sont au même niveau et surtout la surpiqure tout du long (ne pas hésiter à bâtir de façon à obtenir une linéarité optimale). Sur ce dernier point, j'ai opté pour une surpiqure ton sur ton sachant que le denim jacquard était très consistant. Il faut dire que ce détail de surpiqure renforce la ligne très "couture" du pantalon " Embrun".


Une fois le devant réalisé, vous attaquerez le dos et surtout surtout la poche passepoilée...Pour vous aider au mieux, je vous invite à regarder ce tuto vidéo très bien fait ...Là aussi vous devrez faire preuve d'une minutie maximum.
Après avoir associé devant et dos, vous terminerez par la pose des enformes pour terminer la taille. Pour ma part, j'ai choisi d'assembler l'ensemble des enformes et donc cousu d'une seul tenant. 
Dès lors que vous aurez terminé les enformes, il ne vous restera plus qu'à poser le zip (bien vérifier que la taille haute est bien cintrée en amont de la couture) et coudre les boutons sur la fameuse patte prévue à cet effet à l'intérieur.

Bonus, Emilie a réalisé un super pas à pas en images : A voir ;)))


En conclusion, je vous recommande d'utiliser un tissu légèrement stretch pour un max de confort. J'ai été agréablement surprise du pantalon taille haute Embrun ainsi il m'a décomplexé sur cette coupe et surtout il délivre indéniablement avec des escarpins un style so so chic ;))))

Patron : Pantalon taille haute  Embrun (15€ en pochette papier) et
blouse Areli (8€ en pdf)

Tissus : T36 - Viscose plumetis et son imprimé "origami oiseaux" by Bennytex (1.50 x Laize 1.50m) - 7.90€/m - Denim jacquard by Les coupons Saint Pierre (2m x Laize 1,50m) - N'existe plus - 6 boutons et zip de 22 cm

---------------------------------------------------------------------------

As you know, I love the style of Emilie alias Dessine moi un patron. After Violette, Dahlia and of course Sirocco shirt, Emilie proposed me to test Embrun pants, high waist pants belted with a wide belt at the waist, decorated with 6 buttons and stitching visible.In view of my 1.61 m, I must admit that this pants cut puzzled me but I still decided to go and we'll see;)) So I preferred sobriety so I took out a denim stretch jacquard slightly consistant by Les coupons Saint Pierre .And I must say that Embrun has convinced me that this pants cut high waist may also be suitable for a medium size. Note that the shoes will still be maintained to avoid the "packed";)))

Alongside the realization of Embrun, I realized a new version of the
Areli shirt by Republique du chiffon in fact I love this blouse for his breastplate. So on my last trip at Bennytex I fell in love of this sublime viscose plumetis et son imprimé "origami oiseaux" .Slightly transparent, I told myself the butt of Areli shirt would be perfect;)Thus the association of Embrun and Areli seemed as obvious to a so so chic style :)))


Level: advanced - Timing : 5H for Embrun and 2H Areli - Cost : €€€


As a preamble, I invite you to see my first versions of the
Areli shirt to know the design details. Despite the fluidity of viscose, the realisation remains as accessible and do not hesitate to embellish the details of the plastron with piping, I chose a "Silver" color;))


Turning to the design of
Embrun pants, it will suit seamstresses already warned indeed it will ask for a clarification as to the achievement of the front panels and the realization of the welt pocket at the back.Above all, remember to fusing the enformes, piping and pocket;))You will begin by assembling the front through the front yoke that will bend your waist and two front panels.I must say that their cuts are indeed ingenious inner leg 2 sides to allow you to sew your 6 buttons.


This step is not complicated but it will ask thoroughness : check that the front panels are level and especially stitching all along (do not hesitate to build in order to achieve optimum linearity). On this last point, I opted for a tone on tone stitching knowing that the jacquard denim was very consistent. It must be said that this detail stitching reinforces the line very "couture" of
Embrun pants.Once realized before, you make the back, and especially especially the welt pocket ... To help you better, I invite you to watch this video tutorial very well done ... Again you have to be a maximum thoroughness .After associating front and back, you will end by laying enformes to complete the size. Personally, I chose to assemble all enformes sewn and therefore a single source.


Once you have completed the enformes, it will do more than you put the zip (check that the high waist is curved upstream of the seam) and sew on buttons on the famous leg provided for this purpose in inside.In conclusion, I recommend using a slightly stretch fabric for maximum comfort. I was pleasantly surprised of the high waist
Embrun pants and he uninhibited on this cut and especially it definitely delivers with pumps so so chic style;))))

Pattern:
Embrun pants (15 € in paper sleeve) and Areli shirt (8 € pdf)

Fabrics : UK8 -
Viscose plumetis et son imprimé "origami oiseaux" (1.50 x 1.50m Width) - € 7.90 / m - Denim Jacquard by Les coupons Saint Pierre (2m x 1.50m Width) - No longer exists - 6 buttons and zipper 22 cm


3 janvier 2016

Combinaison IRIS

Voilà seulement quelques mois qu'est né Dessiné moi un patron et la première collection d'Emilie m'a plu de suite : la blouse Violette et la robe/jupe Tulipe... Deux patrons que j'affectionne et vous le savez particulièrement Violette que j'ai déjà decliné en 4 tissus pour un style résolument différent ;))) 
Ainsi lorsque Emilie m'annoncé la sortie de sa nouvelle collection je frétillais à l'idée de tester la combinaison Pantalon Iris pour sa ligne et la blouse Dahlia ( à découvrir très prochainement ;)) pour l'originalité de son col froncé... Deux modèles totalement dans l'air du temps ;)))

Pour démarrer cette nouvelle année, j'avais envie d'ouvrir le bal avec la combinaison Pantalon Iris  car je dois dire que j'ai été bluffée par sa ligne et ses nombreux détails : le col officier, les empiècements et surtout la coupe du pantalon... Ce dernier point est essentiel en effet il est très difficile de trouver la juste coupe pour un pantalon... 
Pour cette première version, j'ai privilégié la sobriété afin de limiter les risques d'une coupe (trop) ajustée d'où le choix du noir et jouer sur les détails des empiècements et passepoil.


Comme recommandé, il est essentiel d'utiliser un tissu avec élasthanne pour un confort optimal car la combinaison Pantalon Iris est ajustée. 
Ainsi j'ai choisi une sublimissime crêpe laine dénichée chez Bennytex pour sa consistance (510gr) et ses 3% d'élasthanne. Pour valoriser les empiècements, j'ai choisi un denim jacquard by les coupons Saint Pierre et l'indispensable passepoil lurex déniché chez Fil 2000 pour dessiner les empiècements et la taille ;)))


Niveau : Confirmé - Temps de réalisation : 4h - Coût : €€€


Bonne nouvelle, vous n'aurez pas besoin de décalquer et oui c'est important de le préciser car c'est appréciable et un gain de temps considérable...Merci Emilie !!!
En préambule, il est essentiel de bien marquer tous les repères indiqués sur chacune des pièces, en effet ils seront d'une grande aide d'autant plus que tout "matche" bien. 
Le montage du buste ne présente aucune difficulté simplement l'insertion du passepoil sur les légers arrondis de la poitrine. Il faut dire que l’élasthanne facilite cette étape d'autant plus si vous utilisez un pied fermeture zip pour coudre à raz le passepoil. 
J'ai réalisé le col officier que j'ai "évasé" davantage par rapport au patron initial pour le mettre en exergue. Il ne présente aucune difficulté hormis de la précision au moment des coutures tel un pied de col de chemise. A nouveau, n'hésitez pas à vous aider des repères . Pour un maintien optimal, j'ai posé un crochet au dos du col.
Comme à mon habitude, j'ai monté les manches longues à ce moment pour me concentrer pleinement à la réalisation du pantalon et surtout le raccord du haut et bas.


Le pantalon dispose d'une coupe cigarette, bien ajustée avec ses pinces et chic avec ses poches italiennes. Comme je vous l'indiquais, il est pour moi difficile de trouver la juste coupe (le dernier en date le pantalon Claude by RDC était bien ajusté également avec une taille haute) et franchement j'étais agréablement surprise une fois portée ...NICKEL !!!! Ainsi, je pense refaire le pantalon seul car la coupe me convient bien, en mettant le zip sur le côté ;))) Le montage du pantalon ne présente aucune difficulté.


Une fois que vous aurez cousu la ceinture et les passepoils, voici l'étape cruciale : le raccord du buste + ceinture au pantalon pour une harmonie optimale.
Normalement avec les repères, les raccords tombent justes néanmoins il est important de bien vérifier que  les passepoils insérés sur le buste sont bien dans la continuité des pinces du pantalon (et ce malgré la présence de la ceinture ;)).


L'ultime étape est la pose du zip 70 cm, celle ci nécessitera aussi de la minutie en effet il est essentiel que les 2 passepoils de la ceinture soient bien alignés une fois votre combinaison fermée. A noter que je regrette que le zip descend si bas sur les fesses c'est pourquoi j'ai rajouté 3 cm couture.

En conclusion, lcombinaison Pantalon Iris est un modèle qui m'a convaincu pour sa ligne, son style et toujours important les détails ;))) Je dois dire qu'elle fait tout son effet pour une réalisation qui reste tout à fait accessible dès lors que vous suivrez scrupuleusement les repères et tuto/schémas

Patron lcombinaison Pantalon Iris  by Dessine moi un patron (15€ en pochette papier)

Tissus :Double crêpe laine dénichée chez Bennytex (2 m x Laize 1,50m) - 12,90€/m ou 29,90€ les 3 mètres - Denim jacquard by les coupons Saint Pierre (0,70m x Laize 1,50m) - Passepoil lurex (2m) by Fil 2000 (1,90€/m)


--------------------------------------------------------------------

That's only a few months born Dessiné moi un patron and the first collection of Emilie I enjoyed : the Violette shirt  and the  Tulipe dress / skirt ... Two patterns that I like and you know specifically Violette shirt indeed I already sew in 4 fabric for a decidedly different style;)))

So when I Emilie announced the release of its new collection I was very excited to test the Iris jumpsuit  for its line and  Dahlia shirt (to discover very soon;)) for the originality of its neck ruched ... Both models fully in kink with the fashion trends ;)))


To start this new year, I wanted to begin with the Iris jumpsuit because I must say that I was blown away by its line and its several details: the "officer" collar, yokes and especially the cut of the pants ... This last point is essential for me in fact it is very difficult to find the right cut for pants ...
For this first version, I preferred sobriety in order to limit the risks of a cut (too) adjusted hence the choice of black and playing on the details of the yokes and piping.


As recommended, it is essential to use a fabric with spandex for comfort because the Iris jumpsuit  is adjusted.
So I chose a sublime wool crepe unearthed in Bennytex for its consistency (510gr) and 3% of spandex. To make the inserts, I chose a denim jacquard by les coupons Saint Pierre and the necessary piping dug lurex in Fil 2000 to draw the yokes and size;)))

Level: Experienced - Timing : 4 hours - Cost : €€€


Good news, you do not need to trace and yes it is important to clarify because it is a substantial and significant time savings ... Thank Emilie !!!

As a preamble, it is essential to put all the marks shown on each item, indeed they will be of great help especially since all "match" well.
Mounting the bust presents no difficulty simply inserting the piping on the rounded light chest. Admittedly spandex facilitates this step especially if you are using a zipper foot to sew the piping.
I realized the collar I have "flared" more from the initial pattern for the highlight. It is not difficult except precision at the seams as a foot shirt collar. Again, please help benchmarks. For optimum support, I put a hook on the back of the neck.
As usual, I set up the long sleeves at this time to concentrate fully to the achievement of the pants and especially the top and bottom fitting.


The pants has a "cigarette" cut, snug with pleats and chic with Italian pockets. As I said you, it is difficult for me to find the right fit (the latest in the Claude pants by RDC was also snug with a high waist) and frankly I was pleasantly surprised when worn ... NICKEL !!!! 
So I think again because the only pants cut suits me well, putting the zip on the side;))) The assembly of the trousers is not difficult.


Once you have sewn the waistband and piping, here is the crucial step: fitting the bust pants + belt for optimum harmony.
Normally with pins, fittings fall fair, however it is important to check that the piping inserted on the chest are a continuation of the trouser clamps (despite the presence of the belt;)).

The final step is the installation of zip 70 cm, this one will also require attention to detail indeed it is essential that two piping of the belt are aligned once your closed combination. Note that I regret that the zip down so low on the buttocks so I added 3 cm stitching.


In conclusion, the Iris pant suit is a model that convinced me to his line, his style and always important details;))) I must say that it is doing its effect an achievement that remains quite accessible soon when you scrupulously follow the tutorial marks and / patterns

Pattern: Pants by combining Iris Draw me a boss (15 € paper bag)

Fabrics: Double wool crepe unearthed in Bennytex (80in x 60in Width) - € 12.90€ /m  or 29.90€ for 3 meters - Denim Jacquard by coupons Saint Pierre (30in x 60in Width) - lurex piping (80in) by Fil 2000 (€ 1.90 / m)


4 décembre 2015

Combo : Pantalon Claude et Blouse Majestic

Comme vous avez pu le remarquer, je réalise peu de pantalon hormis l'Alexandria by Named à revoir
Pourquoi ? Trouver la bonne coupe pour un pantalon chic à porter au bureau ou soirée. Pour moi, The Kooples dispose des plus belles coupes particulièrement les pantalons "smoking".
Ainsi, quand j'ai vu le pantalon Claude by Republique du chiffon, il m'a fait penser au style de Christine and The Queens ;)) J'avoue que la taille haute me laissait dubitative et Julie alias Jolies Bobines qui m'a convaincu sans compter la version de Barbara alias Bee Made !
Donc je me suis laissée tenter d'autant plus que Claude dispose d'une fermeture éclair sur le côté ...Pas de braguette ;)))) 
Pour cette première version, j'ai choisi ce magnifique jacquard zig zag café by Cousette pour son motif et sa couleur. 

Ainsi, j'ai décidé d'associer cette troisième version de la blouse Majestic by Aime comme Marie réalisée avec une crêpe "bordeaux" avec un toucher "peau de pêche". Comme vous le savez, c'est une de mes blouses "chouchou" tellement chic portée ;))))


photo 1-1 photo 1-2


Niveau : Intermédiaire - Temps de réalisation : 5H pour l'ensemble - Coût : €€€


En préambule, le pantalon Claude by Republique du chiffon est le modèle le plus facile à réaliser de la dernière collection A/H 2015 en effet il dispose d'un niveau 2/4. Frileuse quant à la conception de pantalon, je valide son accessibilité ;))) 
Si vous utilisez le même jacquard (275gr), il est indispensable de surfiler et de bien thermocoller les pièces ceinture et passepoils.


Vous rencontrerez deux étapes clés :


La première : la réalisation des poches "paysannes" ou passepoilées, il est important de bien suivre les croquis à savoir bien joindre les passepoils et regards de poche de façon à ce que vos poches soient bien posées. Et surtout il est indispensable de marquer la découpe des poches de façon à bien couper votre "capucin" ou triangle au moment de la couture finale des poches "paysannes". Bien insister avec la centrale vapeur pour les stabiliser de manière optimale !!!
A noter : j'ai utilisé une gabardine de coton blanc cassé pour les fonds de poche.


La seconde : le montage de la ceinture très astucieux car celle ci tombe parfaitement et l'ourlet sur l'endroit est idéale pour de belles finitions. J'ai privilégié un bouton pression sur la croisure de la ceinture pour fermer la ceinture sur la pointe.


Pour conclure sur le pantalon Claude by Republique du chiffon, je dois dire que je suis ravie de la coupe car il confère une belle ligne. A noter que la taille haute correspond réellement à la taille découpée aussi attention elle peut paraître un peu étroite. En tout cas, Claude conforte mon envie de pantalons chics et je peux vous dire que le pantalon Claude by Republique du chiffon sera mon patron "chouchou" de ces prochaines semaines.


Passons à la blouse Majestic by Aime comme Marie, je ne vais pas revenir sur les détails de conception ainsi pour en savoir plus n'hésitez pas à revoir ma toute première version. J'ai choisi d'assortir un passepoil en lurex gris anthracite pour relever ce bordeaux si intense. A noter que l'utilisation d'un tissu plus consistant vous demandera plus de précision lors de la réalisation du col et plus précisément le décolleté. En effet, je vous invite à bien réaliser une surpiqûre.


En conclusion, j'aime beaucoup l'ensemble pour le style et l'association de couleurs et imprimé du pantalon.

Patrons pantalon Claude by Republique du chiffon (15€ en pochette) blouse Majestic by Aime comme Marie (14€ en pochette)

Tissus : T36 - jacquard zig zag café by Cousette (2m x laize 1,40m) - 18€/m et crêpe "bordeaux" (1,50m x Laize 1,40m) 

----------------------------------------------------------------------------


As you may have noticed, I don't realize some pants apart by the Alexandria Named to review.
What for ? Finding the right fit for a fancy pants to wear in the office or evening. For me, The Kooples has the finest cuts especially "smoking" pants.
So when I saw the pants by Claude Republic of cloth, it reminded me of the style of Christine and The Queens;)) I own the tall left me dubious and Julie alias Jolies Bobines me convinced besides the version of Barbara alias Bee Made !
So I let myself try especially since Claude has a zipper on the side ... No fly;))))
For this first version, I chose this beautiful coffee zigzag pattern by seamstress for its pattern and color.
So I decided to associate this third version of the blouse by Majestic Aime Marie as a pancake made with "bordeaux" with a touch "peach skin". As you know, this is one of my blouses "darling" so chic scope;))))


Level : Intermediate - Completion time: 5H for both - Cost: €€€


In the preamble, the Claude pants by Republique du chiffon is the easiest model to be produced from the latest collection A / W 2015 in fact it has a level 2/4. Cautious about the pants design, I validate its accessibility;)))

If you use the same fabric (275gr), it is essential to overcast and although the fusing belt and piping parts.

You will meet two key steps:


The first : the "paysannes" pockets or welt, it is important to follow the sketch ie well join the pocket piping and manholes so that your pockets are well laid. And above all it is essential to mark the cutting of pockets to thoroughly cut your "Capuchin" or triangle at the final sewing of "paysannes" pockets. While insisting with the steam plant to stabilize it !!!
Note: I used a white cotton gabardine for pocket lining.


The second: the mounting of the belt is very clever as this one falls perfectly on the hem and the place is ideal for beautiful finishes. I preferred a snap on croisure belt to close the belt on the tip.


To conclude on the Claude pants by Republique du chiffon, I must say I am delighted with the cut because it gives a beautiful line. Note that the high waist cut actually corresponds to the size careful as it might seem a bit narrow. Anyway, Claude reinforces my desire to fancy pants and I can tell you that Claude pants by Republique du chiffon  will be my "favorite" pants pattern of the coming weeks.


Let the Majestic blouse by Aime comme Marie, I will not revisit the design details and for more information please see my first version. I use a lurex grey piping to highlight the burgundy color. 
Note that the use of a fabric more substantial ask you more precision when performing cervical and specifically décolleté. Indeed, I invite you to make a good stitching.


In conclusion, I really like the set for the style and the association of colors and printed pants.

Patrons: pantalon Claude by Republique du chiffon (15€ en pochette) and the Majestic blouse by Aime comme Marie (14€ en pochette)

Fabrics: UK8 - jacquard zig zag café by Cousette (2m x 1,40 m width) - 18 € / m crepe "maroon" (1,50m x 1,40m Width)


Mydress-made. tous droits réservés. © Design : Elsa Gorre.